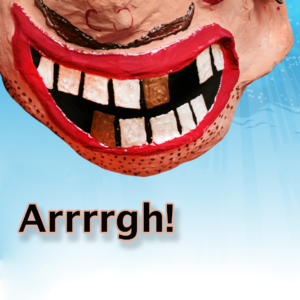
Piñatas can be bought inexpensively but you can easily make a really special one. The ones you buy are generally of the “cardboard-shell-covered-with-tissue-paper” type. (Often they are hard to break open).The homemade ones are often painted or coloured-tissue-papered paper mache.
Homemade Paper Mache Piñata
They do not take as much time to make as you may suspect – they don’t require as much hands on time as drying time. You can apply all the wet paper mache pretty quickly and then just put it away for a few days (it can take days for things to dry!) It’s nice if you have a quiet area of your home to leave the piñata in peace.
 Piñata Materials
Paste
You can mix the “paste” from anything:
- Wallpaper paste
- Watered down white glue.
- White flour and water (medium consistency – perhaps 2-1 ratio flour to water)
If you decide to use the flour and water method – fill a bowl with flour and add the water to it.
If you line the bowl with a plastic bag -which can be closed-keeping the paste from drying out and you can continue to use the same paste … and only have to mix it up once. (Please note: Flour and water will start to ferment in a couple days.) Lining the bowl also makes cleanup a snap.
If you are making the pinata early and plan on leaving it where there are bugs (garage, barn, outdoors) you can add salt to the flour and water paste to make it less attractive to bugs (yech!)
Newsprint
- Newsprint has a distinct “grain” tearing into strips one-way but not the other (try it and see!). You want to tear it with the grain; you’ll get a much nicer result that way.
- Tear your newprint into strips about 1 inch wide, dip them into the paste and then remove the excess paste from each strip and lay them onto the surface of the blown up balloon or form.
- Make sure to let the layer dry before adding another one (don’t make the layer too thick as then it takes an eternity to dry and can get kind of funky-smelling!)
 Piñata Construction
- As a form, use blown up balloons and small cardboard pieces taped together to make the rough form that you need (anything for that matter can be used).
- If you use balloons, it’s better to use good quality (helium grade)balloons for the form and keep the drying piñata in an area without a dramatic temperature change as this can make the balloon pop before you have a good shell formed.
- Another way to construct your pinata is to form the paper mache around a special form and then slit the “soft shell” piñata down the middle to slip it off the form and then patch the slit with more papier mache.
If you start very early then it’s easy … (if you start a week before then it may be super stressful). Making a Piñata involves surprisingly little “hands on” time … but it does require a lot of drying time. You can slap the wet paper mache on for 10 minutes and then put it to the side for 2 or 3 days … and then repeat.
It’s best to embed a rope loop or loop made from a cut piece of wire hanger. Duct tape the extra lengths of wire/rope to cardboard to make them sturdy and make sure that the rope/wire loop section is properly protruding from outside the piñata. Embed the loop after the first layer of cache is applied.
When you have a shell that can support itself, pop the balloon and continue to put on new layers (the more layers the stronger the pinata). Don’t forget to leave a small hole/flap in the finished piñata so that you can fill it easily.
Make sure that the top of the piñata where the hanging rope is coming out of is really thick and sturdy.
If the top is super strong then the unbroken piñata will not plop on the ground (very anti-climactic!).
At the same time, give the piñata a “glass jaw” making it weakest on the bottom so that it will break/open from the bottom.
For a soft piñata use 4 layers of paper or so … you can make them quite a bit thicker for older children.
For teenagers/baseball players, one way to do it is to make the pinata very thick and tough and then make random “stab marks” with a knife (to introduce some weak points into the piñata).
 Piñata Decoration
Go over the piñata with white house paint and a big brush/roller. (the house paint is much cheaper and seals the surface and then you need surprisingly little of the fancier (more expensive) hobby paints to decorate.
Try adding rhinestones, feathers, hats, googly eyes, foil accents. Fabric paint adheres like a dream and is really nice for detail work.
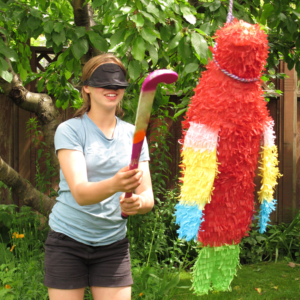 Piñata Use
- It’s nice to hang the piñata in the house and give it a name and enjoy it before it gets smashed (don’t forget to take a picture).
- Make sure to have the piñata displayed in a prominent place at the party so that it can double as a dramatic part of the decorations!
- Line the children up from youngest to oldest (so the heavy-hitters go last!)
- If you have a tree branch you can sling the supporting rope over the branch and pull up at random times to make the piñata bob up and down (to make the piñata harder to hit).
- First round, you could even use a blindfold to make it even harder to hit, to make sure that every child “gets a go”.
- Give each kid a plastic bag with their name on it so that they can gather up all their piñata swag.
 Safety Concerns
- Make sure that the children line up behind you while one of the children is swinging…it would be terrible for a child to end up getting hit by the stick/bat.
- Make the children wait quite far from where the piñata is hanging so that the children have a ways to go before the broken piñata leaks candy.
- The child that breaks the piñata needs to put the weapon down before the children pounce!
- Make sure that there is nothing in the piñata or on the piñata that would hurt someone if it went flying through the air.
- When the piñata is done…. make sure the bat/stick is put away immediately because in the aftermath of the Piñata breaking some kid will pick up the bat/stick and start swinging!
One Last Tip
It is nice to have the Piñata at the very very end of the party.. as the Piñata is almost always done outside and the kids are dressed in their coats and street shoes and have their bag of goodies….
Then the parents are arriving to see the fun piñata breaking and the kids are all ready to head on their way instantaneously.
(Sometimes at the end of a party you may be more than ready to say goodbye to the little ones!)